Beat the Winter Blues - Blueberry Smoothie Bowl

If you are looking to beat the winter blues a delicious smoothie bowl can certainly do the trick! Plus it can give you a boost of nutrients to help give your immune system a boost.

This Blueberry Smoothie Bowl delivers fiber, healthy fats, vitamins, minerals, and some protein! It would be a great breakfast to start your day or even could be a refreshing lunch.  The recipe is listed below! 

Blueberry Smoothie Bowl

Serves 1

Ingredients:

1 cup frozen blueberries (reserve some for the top!)

1/2 cup frozen mango

6 oz plain yogurt

1/2 cup almond milk or juice

1 teaspoon chia seeds

2 teaspoons granola

5 - 6 pecans

Directions:

In a blender combine the frozen berries, mango, yogurt, and milk or juice. Blend until icy and smooth. Then transfer the smoothie mixture to a bowl. 

Line the top of the smoothie bowl with the chia seeds, granola, pecans, and the reserved frozen blueberries. 

Print Friendly and PDF

Game Day Enertaining - Q & A with Chef Pati Jinich

Check out these great game day entertaining tips from Chef Pati Jinich and AvocadosfromMexico.com: 

1.    It’s that time of the year and everyone is preparing for the championship game. What are your favorite game-day recipes? 

A: I love to upgrade traditional game-day recipes with nutritious, and delicious, options. My favorite way is to incorporate avocados. The fun thing about avocados is they are versatile, so the recipe options are endless. 

One of my personal favorites that will impress even the most sophisticated avo-connoisseur is Pati’s Rustic Guacamole with Corn. Surprise guests with unexpected doses of spicy and sweet for the most elegant guac yet. This recipe includes jalapeno, corn kernels, tomatoes and, of course, fresh lime juice! 

Commonly known for guac, avocados are also great for nutritious snacking options. My other game day favorite - it’s a twist on traditional kebabs. All you need is sliced avocado, mozzarella and tomato for delish skewers! For a dipping sauce, you can include balsamic on the side – it’s simple and easy finger food.

2.    What makes avocados so nutritious? 

A: Fresh avocados are a heart-healthy fruit. They provide naturally good fats, and are cholesterol- and sodium-free. 

Good for more than just guacamole, over 75% of the fat in heart-healthy avocados is unsaturated (monounsaturated and polyunsaturated fats). They’re actually the only fruit that has both types of fat!

One-third of a medium avocado (50 g) has 80 calories and contributes nearly 20 vitamins and minerals to your diet, making it a healthy nutrient-dense choice. 


3.    Any other entertaining tips for the Big Game this February? 

A: Always think ahead! If you have a big group coming to watch the game, plan your recipes out in advance and get the shopping done early, so you’ll be able to spend less time prepping/serving, and more time with your guests.

Not everything can be prepped ahead of time, so for what’s left on your list, get everyone involved! Brainstorm snacks or dishes that the kids can help you prep (and have fun while doing it). The simple avocado skewers I mentioned earlier are a great example!  

4.    Where can we go for more information?

A: There are three different places! First, visit our website at AvocadosFromMexico.com for more recipe ideas. Second, join us for our Twitter Party on February 3rd at 7 PM EST! Lastly, make sure to keep an eye out for Avocados From Mexico’s hilarious ad during the first commercial break of the Big Game – it’s sure to inspire your avo love!


Photo Credit (Avocados from Mexico) 

Photo Credit (Avocados from Mexico) 

RUSTIC GUAC WITH CORN RECIPE

Serves 6 - 8

INGREDIENTS:

3 Ripe Avocados From Mexico halved, pitted and diced
1 Jalapeño or more to taste
3 Garlic cloves with the skin on
1/4 Small white onion
1 cup Corn kernals shaved from tender fresh corn, or cooked from thawed frozen corn
1 cup Cherry tomatoes or grape tomatoes halved
1 Tbsp Lime juice freshly squeezed (to taste)
3/4 tsp Kosher or sea salt (to taste)

DIRECTIONS

Place the jalapeño, garlic cloves with skin on, and the onion in a small baking dish under the broiler.
Broil for 6 to 9 minutes, until completely cooked through, soft and skin is charred.
Alternatively, you can char them on a hot skillet or comal set over medium-heat, for the same amount of time, flipping once.
Once cool enough to handle, peel the garlic; mince along with the jalapeño (seeding optional) and the onion.
Place the diced avocado in a mixing bowl and gently mash it with a fork. Add the roasted and minced garlic, onion and jalapeños and mix well. Incorporate the corn, tomatoes, lime juice and salt.
Toss it all together, until well combined.

Print Friendly and PDF

Cheesy Veggie Sticks

I'm on a continual quest to work in more vegetables into our eating routine and these cheesy veggie sticks are my newest favorite! You could almost call them bread sticks although there is now flour or wheat in them - just veggies, egg, cheese, and spices.  The other bonus is that they are quick and easy to make. Here is how this comes together and the recipe is listed below!

First start with cauliflower that is pulsed to about the size of rice. You can find this in the produce section of some grocery stores, with the frozen vegetables, or you can pulse cauliflower in the food processor until it is about the size of rice. If needed press the cauliflower with paper towels to remove excess water. 

Then mix in the eggs, cheese, and garlic powder. The mixture will thicken and be 'dough' like.

IMG_3087.JPG

Next line a baking dish with parchment paper and transfer the dough to the pan. 

IMG_3089.JPG

Then press the 'dough' into the pan and spread it evenly throughout the pan. 

IMG_3090.JPG

Bake it for 25 - 30 minutes, until the mixture is golden brown and starts to get crispy. Note: Depending on how much water is in the cauliflower, you may need to bake it longer to get it nice and crispy, if needed, bake longer until the top is golden brown. 

IMG_3091.JPG

Then top with remaining Parmesean cheese and return to the oven until the cheese is melted, about 5 minutes. 

Then cool and slice into sticks and they are ready to enjoy! 

Then cool and slice into sticks and they are ready to enjoy! 


Cheesy Veggie Sticks 

Serves 6 - 8

Ingredients:

4 cups cauliflower, pulsed into the size of rice

1 1/2 cups shredded Parmesan cheese, divided

2 eggs

1 teaspoon garlic powder

optional: sea salt 

Directions:

Preheat the oven to 400 degrees F. 

Mix the cauliflower, 1 cup of the Parmesan cheese, eggs, and garlic powder together. 

Prepare a 9" x 13" baking dish or small sheet pan with parchment paper and transfer the cauliflower mixture to the prepared pan.  

Press the mixture evenly through the pan and bake for 25 -30 minutes or until the top is golden brown. Top with the remaining cheese and return to the oven until the cheese is melted, about 5 minutes. 

Cool and then cut into strips to serve. 

Print Friendly and PDF

Crockpot Spinach Artichoke Dip

Serves: 14

Ingredients:
1 (8-ounce) package light (⅓ less fat) cream cheese, softened
6 oz nonfat plain Greek yogurt
1 teaspoon garlic powder
¼ teaspoon salt
¼ teaspoon black pepper
1 teaspoon onion powder
1 15 oz can artichoke hearts, drained and chopped
10-ounce package frozen spinach, thawed and drained
1 cup part-skim mozzarella shredded cheese
3 tablespoons Parmesan cheese

Directions:
1. In a small crockpot combine cream cheese, yogurt, garlic, salt, black pepper, and onion powder.
2. Then stir in the artichoke hearts, spinach, mozzarella cheese, and Parmesan cheese. Then stir to combine.
4. Cook the dip on high for 1 - 2 hours or until the dip is warm and lightly bubbly. Then adjust heat to keep warm for serving.

Serving suggestion: Serve with whole grain tortilla chips and sliced veggies for serving! 


Print Friendly and PDF

Feeding Your Little One - Product Pick's, Tips, & DIY Baby Food

Before you start feeding your little one it's important to have a conversation with your pediatrician about when is an appropriate and what is appropriate to feed your baby! 

Then when it is time and you head to the store you maybe wondering what foods and products to buy for your little one!

Before you start picking products, one of the best pieces of advice I can give is a registered dietitian and mom is to avoid and limit products with added sugar. Why get your little ones hooked on the taste of sweets right from the start; instead add a hint of sweetness with pureed fruit as a way to add natural sweetness to baby cereals, yogurt, etc.  

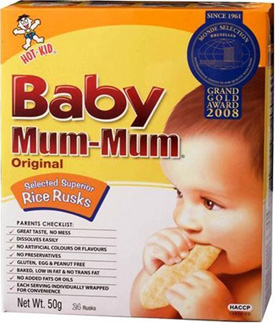
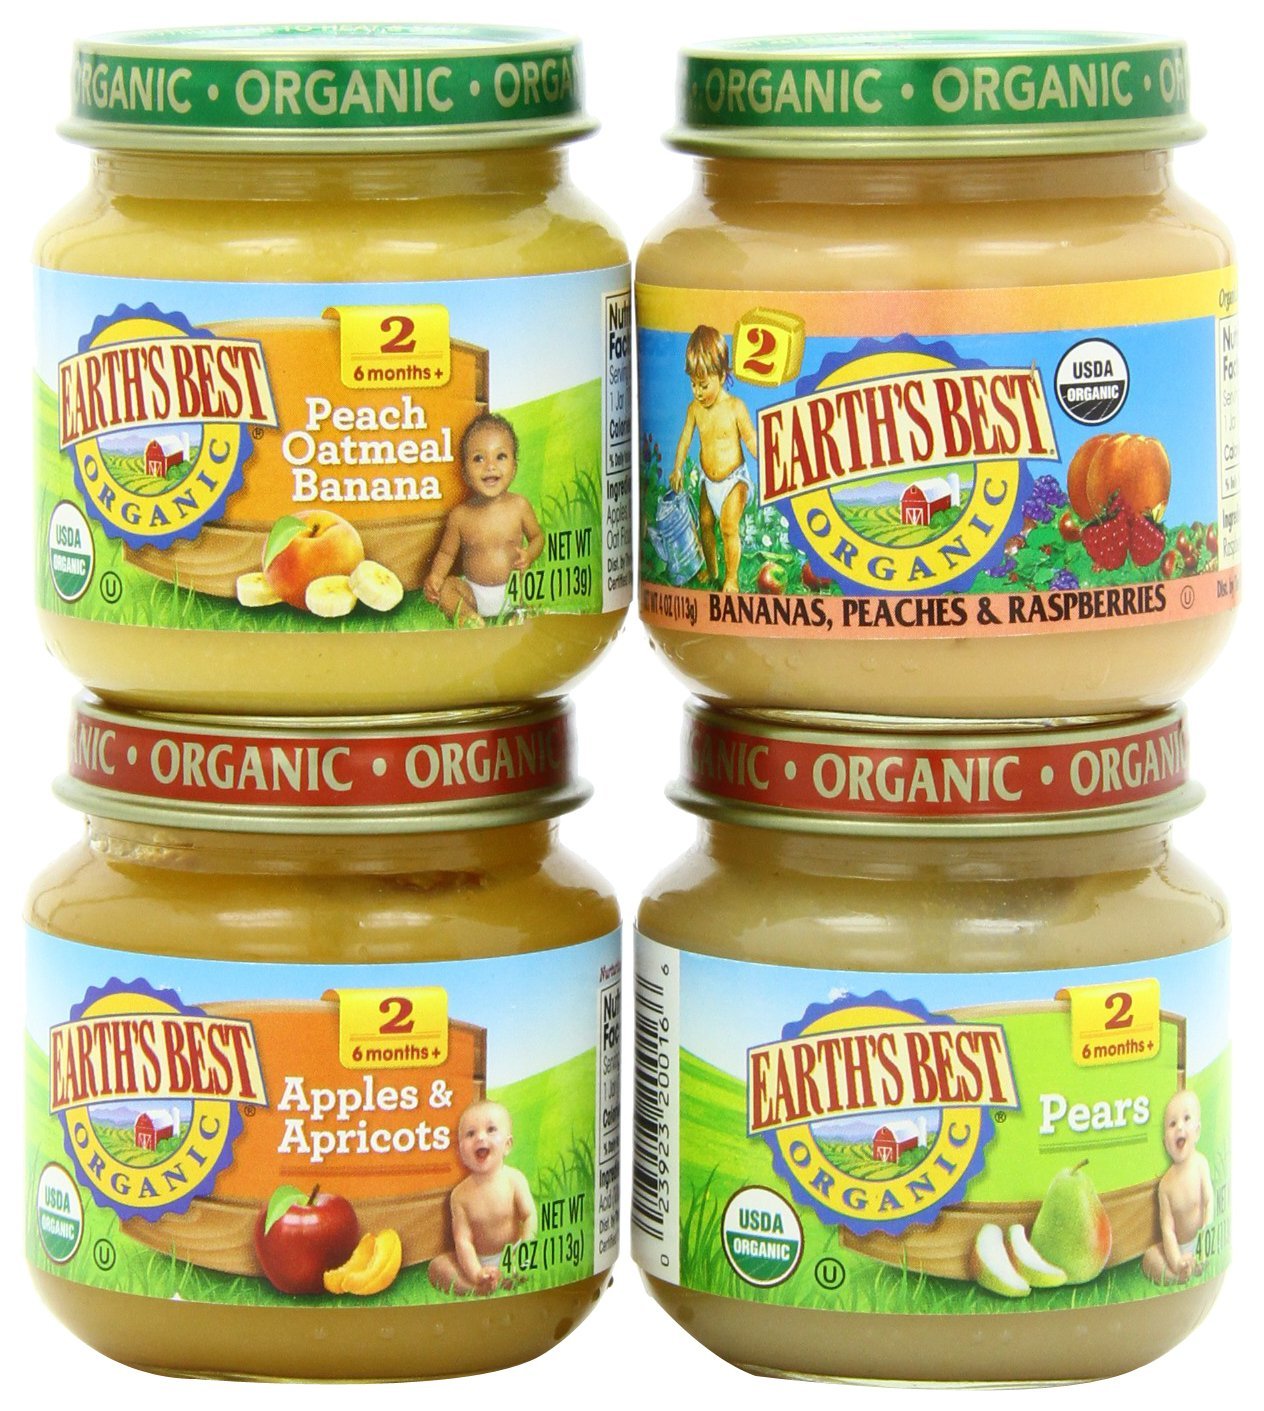
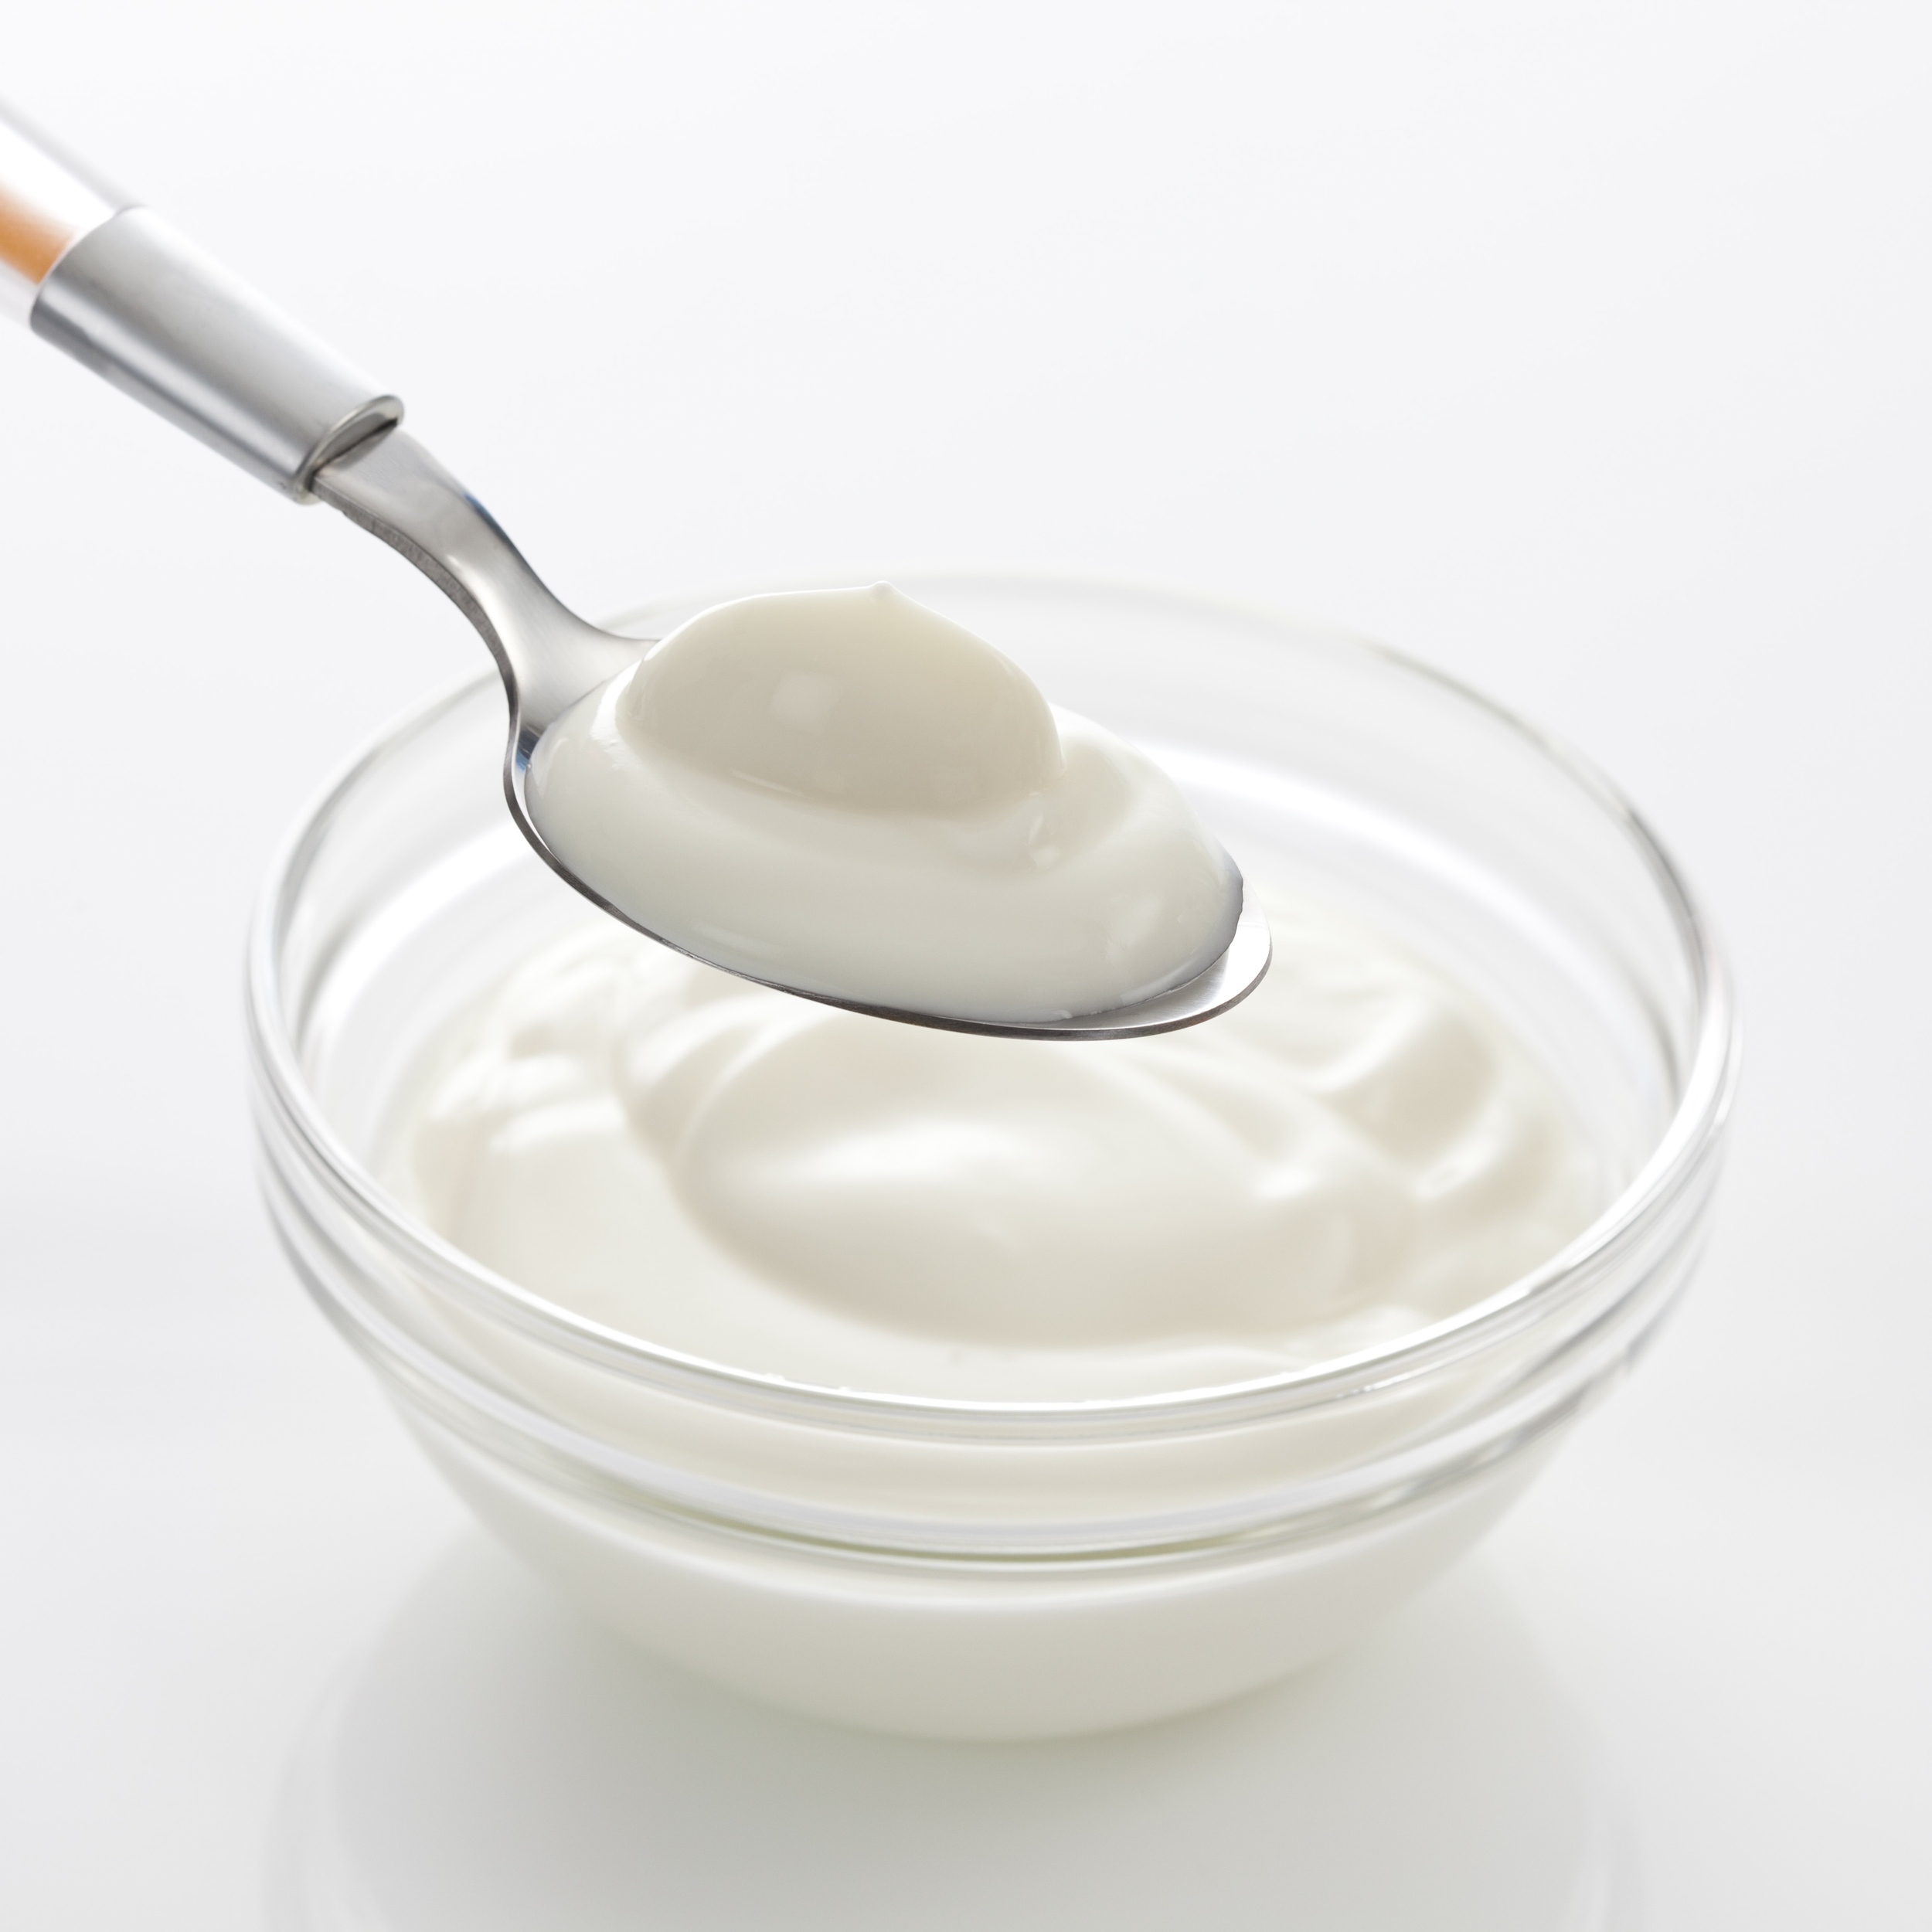
Pictured above are three of my favorite baby food products:

- Baby Mum Mum's - Each serving (4 rusks) is only 30 calories and the ingredient list is nice and simple: japonica rice, potato starch, and pear juice.

- Earth's Best Food - These little jars of food are a great go-to for busy days! What I loved about this product line is that they have been making organic baby food for 30 years.

- Plain Yogurt - Starting your little one with plain yogurt is the way to go and then if needed, add a hint of sweetness with pureed fruit.

Then my next tip is it is worth taking the time to make your own baby food! Here are my DIY Baby Food Steps and Tips:

• First, the parent should wash his or her hands thoroughly and then wash the fruit or vegetable thoroughly.

• Steam or microwave the fruit or vegetable until tender, then let it cool slightly and transfer to a blender or food processor.

• Add 1 T of water and then purée until smooth. Depending on the amount of food, it may be necessary to add more water, but just 1 T at a time until reaching the desired consistency.

As for storing: keep some in labeled containers in the refrigerator and place the remainder in ice cube trays for freezing.  Then once they are frozen, you can transfer the cubes to labeled freezer bags or storage containers with the type of food and date. Typically one or two cubes will make a meal, depending on baby’s age and appetite.

Molly's tips were included in Today's Dietitian (2011) - Click here for the full article and more tips.

Print Friendly and PDF

PB & J Sandwiches & The Golden State Warriors

PB & J Sandwiches & The Golden State Warriors

Three cheers for keeping PB & J sandwiches on the Golden State Warriors menu! 

Print Friendly and PDF

Simple Summer Tasty & Quick Recipes

When it comes to hot summer nights you're in need of quick and tasty recipes! Here are some of my go-to super simple favorites for summer.

Crispy Parmesan Broccoli

Toss 4 cups broccoli florets with 1/4 cup whole wheat panko brad crumbs, 2 teaspoons garlic powder, and 1/4 cup grated Parmesan cheese. Roast for 15 - 20 minutes at 425 degrees F. 

Toss 4 cups broccoli florets with 1/4 cup whole wheat panko brad crumbs, 2 teaspoons garlic powder, and 1/4 cup grated Parmesan cheese. Roast for 15 - 20 minutes at 425 degrees F. 

Roasted Summer Veggies

Slice a zucchini, summer squash, and add 1 cup green beans, 1 cup broccoli florets, 5 cloves of garlic minced, and 1 tablespoon olive oil. Toss together and roast for 25 - 30 minutes at 425 degrees F. 

Slice a zucchini, summer squash, and add 1 cup green beans, 1 cup broccoli florets, 5 cloves of garlic minced, and 1 tablespoon olive oil. Toss together and roast for 25 - 30 minutes at 425 degrees F. 

Garlic Green Beans

Wash and trim green bean. Then place on a baking sheet, drizzle with olive oil and 2 teaspoons of garlic powder. Roast for 13 - 15 minutes at 425 degrees F. 

Wash and trim green bean. Then place on a baking sheet, drizzle with olive oil and 2 teaspoons of garlic powder. Roast for 13 - 15 minutes at 425 degrees F. 

Print Friendly and PDF

Mixed Berry Walnut Crumble

This mixed berry walnut crumble is a simply delicious summer treat! 

Serves 9 

Ingredients:

2 cups frozen mixed berries

1/4 cup sugar

1 tablespoon corn starch, mixed with 1 tablespoon water

1 cup almond flour

1/2 teaspoon baking soda

1/4 teaspoon salt

1/2 cup coconut oil

1/2 cup raw sugar

1 cup rolled oats

1/2 cup chopped walnuts

Directions:

1. Preheat the oven to 350 degrees F. Line a 8 x 8-inch baking dish with parchment paper.

2. In a sauce pan combine the frozen berries, corn starch/water,  and sugar. Heat the mixture so the berries are completely thawed and the mixture will lightly bubble. Once the mixture starts to bubble cook it for another 5 minutes. Then remove from heat and set aside, the mixture will thicken up as it cools. 

3. To prepare the crust/crumble, combine the almond flour, baking soda, salt, coconut oil, sugar, oats, and walnuts. Set aside 1 cup of the crust/crumble mixture.

4. Press the mixture into the prepared baking dish. Then bake for 40 - 45 minutes, until the crust is lightly browned. Then remove from the oven and top with the mixed berry mixture. 

5. Top with the reserved crumble mixture. Return to the oven and bake another 30 minutes, the berry mixture will lightly bubble.

Cool and slice to serve! 

Print Friendly and PDF

Food is Fuel

Recently I had the opportunity to talk nutrition with elementary students, the key message was food is fuel! It seems that children can get mixed messages about calories, which are ultimately energy for their body. Calories are actually very important, necessary, and good for our body. The focus should be on where the calories are coming from and to make sure that MOST calories everyday are coming from foods that deliver important nutrients to help our bodies, from foods like fruits, vegetables, whole grains, lean protein, yogurt, beans/legumes, nuts, seeds, etc.

Along those lines, we discussed about how not all calories are created equal for example calories from an orange a nutrient-rich and provide vitamins to help our body while calories from sugary foods and drinks like candy and soda provide empty calories.

Here's the handout with quick facts/tips on thinking about the concept that food is fuel! 

Print Friendly and PDF

DIY Pizza Dough

If making your own pizza dough seems intimidating, it shouldn't! you can do it and it is SO tasty. Here's the recipe that I've been using... the key: Whole Wheat Pastry Flour. 

DIY Pizza Dough

Yield 2 (14-inch) pizza crusts or 6 single serve pizzas

Ingredients:

4 1/2 cups whole wheat pastry flour*

1 teaspoon sugar

1 envelope instant/rapid dry yeast

2 teaspoons kosher salt

1 1/2 cups water at 110 degrees F

2 tablespoons olive oil

Non-stick cooking spray

*A quick note on flour choices: Another option that works really well is white wheat flour, which is a whole grain and has a lighter wheat taste and texture! Also if 100% whole wheat isn't your preference, try a blend for example: half wheat flour and half all-purpose flour.

Directions:

1. Start by combining 4 cups of the flour in a mixing bowl. Then add the sugar, yeast, and salt and mix to combine. Note: use the dough hook attachment for your stand mixer. 

2. Using a thermometer, check the temperature of the water, it needs to 110 degrees F for the yeast to get activated properly. If the temperature isn't correct (too hot or cold), your dough may not rise.

2. When the mixer is running on low, slowly add the 100 degrees F water and continue to beat/mix the mixture until the dough starts to form into a ball. 

Once the water is all added, let the dough beat/mix for 30 seconds - 1 minute and check the texture of the dough. If the dough feels sticky to the touch, add in additional flour one tablespoon at a time and beat/mix the dough between additions. If the dough feels too dry, add a tablespoon of water at a time. Note: I usually add an extra 2 - 3 tablespoons of flour, my dough is typically not too dry.

The the dough should be ready to form into a ball.

3. Transfer the dough to a cutting board that is lightly dusted with flour and with your hands, gently knead the dough until it is in a nice firm ball shape (like pictured above).

4. Spray a large bowl with non-stick cooking spray, add the dough, and cover with a piece of plastic wrap. Then let the bowl sit in a warm spot in your kitchen and let the dough sit one hour, it will double in size. 

5. Once the dough is doubled, transfer it onto a floured cutting board/working surface and gently knead it. Then cut the dough into 2 equal parts or six smaller parts if you're making individual pizzas. 

Follow the pizza preparation method of your choice like grilling or baking! See the below tips for grilling pizza.

Grilling Pizza Tips

Grilled pizza is so yummy! It works best for single-serve pizzas. Although, my husband is the one who does the grilling of the pizza, here are some tips for how to grill pizza:

Pre-heat the grill and prepare your pizza toppings of choice (sauce, cheese, etc.).

Using a grill pan/screen, place one piece of the dough onto the grill pan/screen. Allow the dough to grill until it is lightly browned. Then flip the dough and top the grilled side of the dough with sauce and cheese. Allow the cheese to melt and the other side of the dough to grill. Then remove the pizza and place it on a baking sheet.

Repeat!

Serving suggestion: Serve with a large salad topped with plenty of your favorite veggies!
Print Friendly and PDF